Monday, April 18, 2011

So fast, so furious

I know what you’ve been thinking: it was the weekend, why hasn’t Erin posted her craft projects? Well, fear not my little chickadees, the long awaited moment has come. I made quite a few things this weekend, and most of them are in the dumpster outside of my apartment, including my failed attempt at a birthday surprise for my mom. Better luck next year!
Anyway, this is SUPER easy, takes less than 30 minutes, recycles, and is pretty cute.
This is what you need:
Card stock
a glue stick (I enjoy elmer’s washable school glue in purple..it dries clear)
Your annoying mailers that come every week with tons of coupons you will never use
An exacto knife
Spray adhesive (Elmer’s should pay me, I like their multi-purpose spray adhesive)

First, go through the mailers and pick ones with interesting colors. Now take your exacto knife and cut them into thin strips.

Lay out the little strips in a desirable pattern. Take your handy spray adhesive and coat the card stock. Transfer your pre-laid out strips over to the cardstock.

Now, if you feel like you want your crafting to take a long time, stand up and go for a walk. If you want to feel like a crafter on speed, keep going on to the next step.
Take a second piece of card stock and draw a design on it. I drew a flower. Cut out the design. You want it to be mostly relief so that all your pretty strips show through. Now flip the cut out over and coat it with your glue stick. Flop it on top of the strips. You’re done!

Sunday, April 3, 2011

Restyle of Mum's Matronly Gown

Now that I no longer have homework to do I have become a crafting superstar! About a year ago I snagged a dress from my 94-year-old grandmother’s closet. Mum was really excited that I wanted to wear something that she had once worn. Little did she know what I had planned for it. I cut it all up and dyed it purple. I don’t feel bad at all because I would have loved to wear her wedding dress, but she cut it up and dyed it blue. So there Mum! We’re even.
Anyway, as you can see, this dress was awful, and in need of an update.

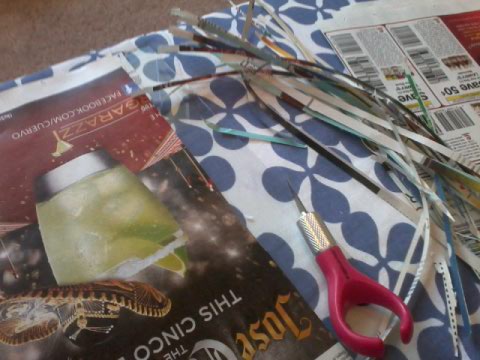
I started by determining the length that I wanted the dress to be, then measuring and marking with some tailors chalk from about 1922. I love it. It makes me feel legit. Next, I used some pinking shears to cut the fabric, because I decided that I didn’t want the thicker line of a rolled hem on the bottom (or maybe I didn’t feel like ironing…)

Next, I hacked off the god awful sleeves. I went for a cap sleeve because I think that they look good on me. I bet a different type of neckline and sleeve would have worked better aesthetically for the dress, but I’m wearing it so I get to pick.

After hemming up all the edges, this is what I got:

Then I decided that the weird flesh tone needed to go. I spent 15 minutes in the dye aisle at the fabric store and finally purchased Jacquard iDye Poly.

The directions on the back of the package, the inside of the package, and the website are all different. Very convenient and not confusing at all. So I came up with a hybrid of all of the directions and did this:
First, get a huge pot and fill it with water from your shower (this is because the water pressure in your kitchen sink sucks.) Then, put the dress in the water and make sure there is enough for the dress to “move around”. I poked it with a stick and made sure that I could swirl it. Take out the dress and throw it in the sink. Pour in the dye packet and the “color intensifier”. Mix it up. This takes a while and you will notice little powder bubbles popping up.

Next, boil some water in a separate pot. Add 1 cup of salt and stir it up. The salt will not dissolve completely. Add the dress to the dye pot, then pour the salt mixture in. Mix. The dye pot should be just below boiling for the entire time. I let it boil for an hour. Make sure that you are not going to use the pot or the mixing stick for food, unless you want to ingest toxic chemicals. Also, remember to take off your new white watch or it will be your new purple watch.
After letting it cool for a few minutes, remove from the pot, and throw it in a Safeway bag.

Grab some quarters and run to the laundry room to get the open washer before anyone else. Wash the garment on “warm”, then dry on low. Doot doot doot dooo! You have a new awesome dress!

Next, throw on a new belt and take a not awesome mirror camera phone shot:
Mum wishes she had this dress!

Saturday, April 2, 2011

Restyled Lampshade

Mostly because it’s a Saturday and I have nothing else to do, and partly because I am slightly hungover from the “90th Street Olympics”, I decided to make a new lampshade. I saw a tutorial online and thought to myself, “that’s way too complicated, I’m sure that I can make it easier.” Nope. I definitely made it more complicated, but it turned out great, and now that I can reflect on the process, I am going to leave out the weirdo extra unnecessary steps that I added. BUT here is the gross stained lampshade that I started with:

Disgusting. I can’t even begin to explain how I let it sit on my side table looking like that. I am embarrassed and ashamed. Not really. Anyway let’s get too it.
First, create a template. I didn’t have any butcher paper so I used a newspaper add. Take a sharpie and trace around the lampshade as you roll it on the paper. This would probably be much easier with an assistant, but I was still wearing pajamas and hadn’t showered so that wasn’t an option for me.

Now, make sure that the template fits! This is crucial. Especially when using fabric that is $9.99 a yard. You will be mad!

Taa daa! It fits. Next I used my trusty disappearing fabric pen and left ¼ inch seam allowance around the template.

After cutting, iron it. I always think that it’s not necessary, but do you really want your lampshade to look all crumpled up? No, you don’t. Iron it.
The next few steps don’t have pictures, so just visualize this:
1st sew the edges of the fabric. Make sure to pin and take your time or else your fabric is going to look funky.
2nd use spray adhesive to attach the fabric to the lampshade. It was easiest (after a few trials) to start at the top edge and then smooth all the wrinkles from there. Once the fabric is in the correct place, use fabric glue to seal the seam and the rim of the lampshade.
Waa laa! Beautiful lampshade!

Friday, April 1, 2011

Mini Apple Pies

Being the crazy person that I am, I decided that the perfect appetizer to bring to a party would be mini apple pies. I’m sure I saw some at one time or another and thought “how cute, they are so tiny!” This was obviously an incomplete thought process because making tiny little lattice tops for apple pies is super annoying and time consuming. But, they are darn cute. So here is what I did:
First I made my apple pie filling. This was very easy. Take some apples, chop them up into little chunks, toss in some butter, sugar, and a little bit of cinnamon. Put them on medium heat on the stove and go do something else. Come back and stir every so often (about 5-7 minutes) and after about 15, presto! Delicious apple pie filling!

Next, I cheated. I used store bought pre-made pie crusts. You can buy them in the pre-made cookie dough section (the horror!) I used a little tiny cup to make circles and filled my mini muffin pan. A box usually has two crusts, one crust makes just enough for 12 mini pies with lattice if you are very talented like myself.

Then, I added my pie filling. I took the remaining pie crust and smashed it into a ball. I re-rolled it and used a pizza slicer to make thin strips that make the lattice. To make things easier on myself, I made the little lattice on the counter and then placed it onto the top of the mini pie and pushed the edges down.

After way too long, I had completed my 24 mini pies. Bake them at about 350-375. Check on them frequently, you don’t want them to burn! My first batch took 15 minutes and the second took almost 20, so who knows how long yours could take.
They come out of the oven looking delicious:

And, they are SO tiny and adorable!

I did the math, and I figure that each one is about 100 calories, but really? Who cares? They’re to cute not to eat.