Monday, December 26, 2011

Fabric Junky

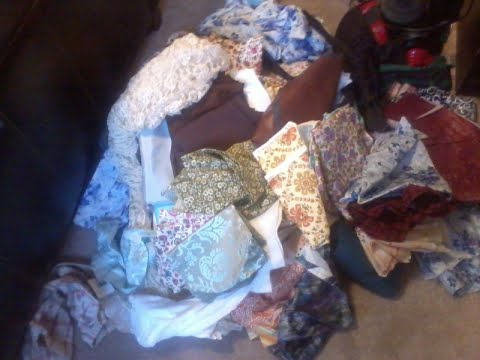
You may have never heard of this addiction before, but it is nothing to be laughed at. Fabric purchasing is a real problem. Who can stop themselves from wandering the endless shelves of bolted fabric. This is a sensory overload for everyone. The texture, colors, and smells, not to mention the bitchy old women that work at fabric stores and think that you are there to wipe your filthy paws all over their pristine fabric. You can’t help yourself from walking down the “craft aisle” at the thrift store and scoring a vintage piece of fabric or upholstery. Those are always the best and most rewarding finds. People may laugh when they see piles of fabric in your tiny apartment, but who do they come to when then need something hemmed, patched, or sewn (or have you sew tons of custom curtains that you spent every weekend on for at least four weeks)? That’s right, they come to the fabric hoarder.
Luckily, I have come up with a way to hide it. Here is my super organization of all the fabric I buy for no apparent reason. First, allot yourself an amount of space. Be very firm about this. Fabric has a tendency to multiply itself at a very rapid rate.
Next, fold all of your fabric neatly. Organize it! I divided mine into categories: outdoor/sport/fur (haha), trimmings/linings/interfacing, and pretty shit. I then took my shoe shelf, which never gets used, and placed it in the little tiny craft corner and placed all the fabric on it.
Are you so impressed?

Salted Caramel Sauce

Winter Break.  As a kid, this was the best thing ever! No school for two weeks! Then as a college student…best thing ever! No school for a month! Post-college, not so much.  Working everyday except Christmas.  Now, back to NO SCHOOL FOR TWO WEEKS. Awesome.  I went to Maui and spent some much needed time doing nothing on the back and by back I meant beach (when I saw that typo I had to leave it...too funny).  However, now that I am 25+ I lathered myself in sunscreen instead of Maui Babe, and came back looking like I got a level 1 Versa Spray Tan instead of looking like a Tahitian Princess.  Oh well. Anyway, I have a recipe with a stolen picture….

Homemade Salted Caramel Sauce:
You will need…
1 cup water
2 cups sugar
1 cup heavy cream
¼ tsp sea salt
A lot of patience
1 microwave
1 saucepan
1spatula
1 whisk
1 stove that does not have a glass top (or your caramel will be Michael Jackson style…white.)

Step 1: Pour water into the saucepan, and pour the sugar in the center, not touching the sides.  Good luck, I couldn’t do it, but it doesn’t seem to matter that much, but at least TRY.  DO NOT STIR.
Step 2: Heat over medium heat until the sugar dissolves (about 20-25 minutes) DO NOT STIR.
Turn to high until it turns golden brown.  Who knows how long this will take, one time it took 15 minutes and then next time it never got dark…hmm  but, DO NOT STIR
Step 3:  Heat the cream in the microwave for about 45 seconds (it should almost be golden brown too) you are doing this so it doesn’t turn into a lump fest in your pan when you whisk in the cream
Step 4: Slowly whisk in cream.  This part is always hard for me because slowly isn’t very descriptive…maybe sing a little song or something while your doing it and make sure you don’t finish before you're done.  Or just dump it in, I don’t think it really matters.
Continue boiling until the mixture thickens.  But don’t get all depressed that it’s not thick enough, it will get thicker as it cools. Add salt and then let it cool.
Step 5: Put it in some sort of container.  I bought little jam jars at Fred Meyer.  A double recipe filled 12.  Pour the cooled (slightly) caramel into the jars.  I let mine cool for about 30 minutes before pouring because I was paranoid that it would all stick to the pot and then I would spend my night scrapping it off with only my tears to help get it unstuck.
Step 6: Put the jars in your car in 30 degree weather over night and then handout to your staff at work for Christmas presents!


Saturday, December 3, 2011

Faux Fur Vest

Pretty much every Saturday I go thrift store shopping.  Today it dawned on me that I hadn't been to the Value Village on 85th in a while.  As soon as I walked in the door, I remembered why: I hate this Value Village. It's always really crowded, the "nick knack" shelves are ridiculous and unorganized, they hang their jeans all weird by the thigh, and there are tons of unattended children wandering the aisles wreaking havoc on those of us who have chosen to not burden the world with our annoying spawn.  As I wandered around I kept running into sweater vests...tons of them.  Then I remembered a photo I had seen in a magazine of a woman wearing a knitted sweater with a fur collar.  So, I bought a mens' sweater vest, and a McCalls  pattern for a hideous cardigan and came up with this:


You will need:
Sweater vest
pattern that has a collar
faux fur
sewing machine
polyblend lining


I bought my fur at JoAnns.  Another bad choice.  It was 5:54 and the stupid pay to park was still in effect.  I looked around, thinking that there would be no parking meter reader in downtown Ballard on a Saturday.  Wrong, ma'am.  There the little asshole was in his go-cart hybrid thing that they run around on.  I only had a quarter, so I grossly over paid for my 6 minutes of parking, and carried on.  I entered JoAnn's, which apparently was having an old ladies with walkers convention.  They were EVERYWHERE.  I waded my way through their horrible floral scented perfume and made it tot he faux fur area.  after carefully selecting the cheapest fur available I made my way to the cutting counter.  I am number 85.  they are on number 83.  Great, not that long.  Just kidding.  Number 84 is no where to be found.  This is what I get to listen to for the next five minutes "Now helping guest number 84 at the cutting counter."  Nothing.  Wait one minute "Second call for number 84 at the cutting counter." Wait another few minutes...the little asshole behind the counter just smiles.  Dude, the store isn't that big, they aren't here! "Last call for number 84"  Nothing.  Then he starts organizing remnants.  "Well I guess they aren't coming, guest 85?" Dear lord, who gave you a job?! Then the best part "Oh, this is beutiful fabric!" Are you kidding? It is matted fake fur. Get out of my face.  I digress.


First, Cut the sweater vest down the middle.  Also cut out the pattern pieces that you will be using.
Now, fold the fur in half, and cut the collar out.  Make sure that you are cutting through two layers of fur, and that you DO NOT cut the fold open.


Now, cut a piece of polyblend lining out.  This is going to make it so little annoying ass chunks of fur don't start to fall off of your collar.  At this point, my jeans were covered in fur and it looked like Iris the Cat had snuck into my apartment and coughed up a ton of hair balls.
Sew the lining to the right side of the fur (you are going to flip it inside out, so pretend that you are making a little furry pillow, so leave a little two inch section in order to flip.


Make sure to trim really well around the edges before flipping it right side out, or else it's going to be all chunky and gross.


Now, hand sew the little opening shut.  Pin this U shaped tail to your vest and sew it on.  Make sure to follow the seam where the lining meets the fur, or else it looks like a disgusting fur cornrow along the edge.
Last step: Sew the cut edge by folding it to the inside of your vest and running a 1/4" seam.  Get out a lint roller and cleanup all the spare fur.  And look! Your very own Forever 21 style fur vest!


Sunday, November 27, 2011

Yoda's Ribbed Sweater takes on a new life


I bet you’ve been asking yourself for years now…what do I do with those Ralph Lauren ribbed turtleneck sweaters that I’ve been saving for 15 years? Well, wonder no longer.  When I was gifted an assortment of them, I rolled them into a ball and tossed them into my “craft bookcase”.  If you’ve ever been to my tiny studio, you may have noticed the bookcase with a curtain, it’s hiding a very, very, crazy craft secret! Tons of ribbed turtlenecks! AHHH. Anyway, I decided that I would use the ribbed turtleneck to make an infinity scarf.  I started the project and was about 15 minutes in, then I lost motivation and tossed the sweater back into the bookcase again. 
Once I started working on it again, I was so engrossed in what I was doing that I didn’t take pictures…but I did find this very helpful tutorial which describes pretty much exactly what I did, minus beer, The Knife on Pandora, and a lot of swearing at my sewing machine. Also, this chick is not funny.  But her pictures and instructions are spot on: boring blog Here is my finished product, please ignore the badly conditioned Irish fro.

Friday, October 21, 2011

Whiskey and Empanadas

By far, the best empanadas that I have had are from La Isla in Ballard.  But, if you are from Ballard....and cheap, you can make your own. Because this has been quite possibly the worst week of my life, you will get two recipes in one! Lynchburg Lemonade and Crab Empanadas!


First, take a deep breath.  It's been a long week girl, but it's over now! Turn on The Rolling Stones Pandora Station. Get out your fifth of Jim Beam, your Triple Sec, Sweet and Sour, and Diet Lemon Lime Soda.  Grab a jar, and mix 1 part whiskey, triple sec, and sweet and sour, with 4 parts soda.  Whisk that together in your handy jar and...wow, things just got way better with your Lynchburg Lemonade (except it's not Lynchburg because I substituted Jim Beam for Jack Daniels)! 
.


Now, you're going to make some empanadas ghetto Ballard style.   
You will need:
I box Pre-made pie crusts (the refrigerated rolled up type)
2 cans Canned crab meat (I bought the "fancy" kind)
A bottle of flavored mayo of your choosing (I picked garlic&herb on a whim, I would recommend chipotle)
a spork (to reduce dishes)
a cup
a rolling pin
baking sheet
foil
olive oil


So, take your crab and open the cans.  The crab meat will be wrapped in weird little wax paper packets.  Drain off the juice.  Feed it to a cat.  I owned a cat once.  The worst six months of my life.  She didn't like the crab juice when I put it in her bowl, pretty picky for a stray that should have been happy with having a home, but whatever.

Next, put it in a bowl and squirt some of your flavored mayo on it.  Mix this with the "spoon" part of your spork.
Looking good so far? Reward yourself with a sip of your Lynchburg Lemonade.
Now, grab that cup and start making little disks out of the pie crust.   
When you have a whole bunch of scraps, ball them together and whip out your new rolling pin (Shout out to Chris Galloway. Thanks Mom!).  Roll that extra dough flat and make more disks.
Take the spoon side of the spork and dish out a little crab mixture into the center of the disk. 
Fold over and press with your finger, then rinse your spork and switch to the fork side.  You will now press that down to secure the empanada.
Put some foil on your cookie sheet, toss those bad boys on there and drizzle some olive oil on top.  Take a paper towel and spread the olive oil evenly on the dough.   
Bake for about 10 minutes on 400.
BAM! you're done, and drunk! Now, package them up.  Carefully place them, and your jar of Lynchburg lemonade in a reusable grocery tote, and get on the bus to travel to the birthday party that you have made these for!


Monday, September 26, 2011

the BEST coffee in the world!

I am so impressed with myself at this second that it's pretty unbelievable...well maybe not, since I am VERY impressive.  However, this coffee is SO good.  I would drink the entire jar if I didn't have plans to put on sweats, crawl into bed, and finish reading a book about Autism. Anywho... this is what you need:
2/3 cup coffee ground for french press (aka, coarse)
1 Tbsp brown sugar
1 tsp  cinnamon (I can't help but think of Sleeping Beauty when I write that... one "tisp")
3 cups cold water
A jar
a French Press
(I still have no idea why my camera likes to do this awesome two-tone thing)


So, measure out all of your ingredients, throw them into a mason jar, and shove it into your fridge.  Go out to a wine bar with your friend, wake up in the morning and watch the Packers win. Then, come home and think to yourself...I was going to write a blog about something, but the tall cans of PBR are making my memory foggy.  Go to sleep, then come home from work on Monday and say out loud to yourself in in your studio "oh yeah you idiot, that coffee is still in the fridge."

Take the coffee out of the fridge and dump it into your french press.  Inhale as you do this because it smells delicious!

Rinse out the jar, and pour the coffee back in (after pouring a glass for yourself).  Store it in the fridge.
You can add a little cream if you want, but honest, it doesn't need it!
...YOU'RE WELCOME!


Saturday, September 17, 2011

Banner Birthday Card!

Oh man, oh man. I’ve spent my week laminating PCS (pronounced pecks, Picture Communication Symbols…more on these later) and using boardmaker to “craft”. Entertaining, but not enough for me. And, btw….I am now the proud owner of a laminator, I’ll let you look at it. Anyway, I woke up Saturday morning feeling grumpy because it was cloudy, and tired because I’ve been drained of my life force this last week. So, I decided to start my day with crafting! I have been a little obsessed with banners lately, so I decided to make a birthday card using the same concept…only cooler. (Please note that I have already used ellipses 3 times.) So here we go: Banner Birthday Card Tutorial!
You’re gonna need:
Cardstock
Construction paper
A sharpie
String (I used darning yarn)
Scissors
Glue Stick
First, put on your favorite Pandora station. Today I picked The Rolling Stones. Now, get out your “antique” tv dinner tray to craft on.
Take your construction paper and fold it in half. For this I used 3 inch square pieces of construction paper. Draw a little triangle on them with the base of the triangle on your fold. Cut them out!
Aren’t they cute??
Write “Happy Birthday” in sharpie….Can you spot my mistake yet?
Now, take your string and your Elmer’s Glue stick (that you already own from making your “So Fast, So Furious recycle strip card”. Glue the triangle together and sandwich the string in the middle.
Once you have “Happy” and “Birthday” on two different strings tape them into place. Do you see the mistake?
Take a sharpie and note how awesome your gold nail polish is as you poke a hole in the card stock.
Tie the string in a small knot. Repeat 3 times (duh). And now, I will reveal the mistake, I mixed up the “y”. whoops. The pattern is RUINED. Now, look how crafty you are!
But wait! Are you now obsessed with banners too? They are damn cute. So, take some shit from around your house and make more. I took a map and cut it up, then used ric rack and super glue to make a banner for underneath my Saucer Picture Frames!
Also, I never thought I would say anything like this, but I love the new Blogger interface.