Saturday, May 7, 2016

Mother's Day Quiche

So, the conversation went a little something like this: 


I decided to make quiche. Only, because I'm me, I had to make it "special" with  a potato  crust. 
Here is what you'll need:
2 russet potatoes
11 eggs
2 cups sliced baby portobello mushrooms
1 summer squash, sliced
1 zucchini squash, sliced
1 cup red onions diced
3 minced cloves of garlic
1 can artichoke hearts
1 cup heavy cream
Dill weed
Salt and pepper
Oregano 
1 bag shredded cheese (white cheddar is good)

So, heat the oven to 400F. While your oven takes ten years to do this, grate your potatoes. Lightly beat one egg, and then mix the egg, potatoes 1/2 cup of the onion, and 1 cup of flour together. Grease the dish you are going to use and spread the potatoes evenly on the bottom and up the sides, just like you would with pie crust. 

Your oven is probably faster than mine and done preheating by now, so pop the dish in the oven. 
While the crust is baking, cook the rest of the onion and garlic until softened. Add the baby portobello mushrooms, salt, pepper, dill and oregano to taste. Once the mushrooms begin the soften, add the squash and artichokes. Cook until squash is soft but not mushy, no one likes mushy squash unless they don't have teeth. 

Beat the remainder of your eggs in a bowl. Add 1 cup of heavy whipping cream, salt and pepper to taste, and slowly mix the heavy whip in... Don't go too fast or it will begin to turn into whipped cream, which would be weird. 
Next, pull the crust out (it's been 20 minutes!) use a slotted spoon to transfer 1/2 the veggies into the crust. Put cheese over them then pour the egg mixture on top. Dump the rest of the veggies and more cheese in (save some cheese for the very end). Push any veggies that are not under the egg down with your slotted spoon. 
Turn the oven down to 350F and bake the quiche for 35/40 minutes or until you stab it with a knife and there is no evidence left on your blade. 

And, that's how you cook when you grew up in Ballard. 

Sunday, April 5, 2015

Whole30 ish: Easter Eggs, or just eggs in general


What came first? The chicken or the egg? WHO CARES! They are both delicious in both forms.  You don’t like one, try another.  I don’t like ice in my water, maybe you don’t like chicken, but you surely can’t dislike an EGG.  They are so delicious.  They are also a staple of breakfast and snacking in Whole30, or in what I am doing now…Whole9 (which is life…you just eat whole30ish most of the time-avoiding the things you know cause issues *ahem* dairy, beans, sugar- and then make decisions about the food you are going to eat and decide if it was worth it or not).

So here are some tricks for eggs that helped me out:

Poached eggs.  Let me be basic for a minute here: I. Can’t. Even! OH MY GOD. I LOVE poached eggs. Ok. So, sometimes I use my egg poacher
I bought mine at Value Village and then bought a heavy sauce pan to go with it.  You can buy them new, but they are actually attached to the pan, making them a one use item...which is dumb, and at Target they are $500. Just kidding, but this one was $2.99 and I see them at Goodwill and Value Village all the time, and I use the sauce pan to make poached eggs and other various items (paleo tortillas anyone?), making the pan useful in multiple ways.

When I'm not using my egg poacher, I use the Julia method.  I'll describe it, but there is a really helpful description and video here:

So, you will need a pan, a shallow dish (I use a little cooking salt bowl, a ramekin would probably work too), slotted spoon, and a timer (or just count 1 Mississippi...).

Get your water boiling, drop in your eggs still in the shell for 10 seconds.  Pull them out with the slotted spoon.  Crack them into your ramekin (individually for this part).  Take your slotted spoon and get the water swirling.  I'm pretty aggressive about my tornado (the video I shared is not). Pour your egg into the whirlpool.  I then immediately add the other egg.  Cook until your preferred level of yolky goodness Anything longer then 4 minutes for me is no bueno, but do what you want.

Ok! Now that you have eaten breakfast, you can start some intensive meal prep and hard boil 7,000 eggs.  You might be thinking "but my hard boiled eggs always have that gross grey rim and they are so hard to peel!"  No longer my little chickadee. Steam those bad boys and your troubles will disappear!

Steamed hard boiled eggs
You will need:
a large pot
Slotted spoon
a large bowl
ice (or other frozen items)
kitchen timer (counting isn't going to cut it on this one)

Fill your pot with enough water to cover one layer of eggs (but don't put the eggs in the pot yet).
Bring the water to a boil.  Carefully place your eggs into the boiling water.  Cover and boil for 10-15 minutes (this is where you will have to trouble shoot.  Try out different lengths until you find the one that works for your stove and pot...I use a stock pot with a pretty heavy bottom and I have an electric rage.  I boil for 15 minutes).  While your eggs are boiling, get your large bowl and fill it with cold water and ice (or if you are me and don't like ice, therefore refuse to let it take up room in the freezer, throw in your jars of frozen bone broth). As soon as the timer sounds, rescue your eggs from the hot tub with a slotted spoon and place them in the ice bath.  Let them sit in there until they are cool to the touch.  Then, crack and peel them in the cold water. Sometimes I run more cold water into the bowl as I am peeling.

Another egg thing I do:
Each week I make some sort of egg grab-and-go for breakfast.  Last week I made a scramble.  I've done little egg cups in muffin tin with uncured pork.  It's easy, fast, and delicious. Here are two recipes that I made up.  good luck!

Turkey Sausage scramble
1lb ground turkey
1 16oz jar of salsa (check ingredients for sugar and other hidden garbage)
1 Anaheim chili (roasted, peeled, and diced)
1.5 tsp of all of the following: cumin, garlic powder, cayenne pepper, black pepper, paprika
1 tbsp coarse salt
1 tsp bacon fat (or another cooking fat of your choice)
10 eggs

Brown the turkey.  Drain off the fat.  Add all dry ingredients.  Once incorporated, add the chili.  Then, dump in the salsa.  Beat your eggs and pour over the meat.  Use your spatula to incorporate the eggs and meat. Taa Daa!

Egg and Meat cups

Roasted Red pepper strips
5 eggs
5 slices of uncured no sugar added pancetta 
muffin tin
salt and pepper to taste

First, oil your little muffin tin.  Do not use grape-seed oil.  That shit will stick to your tin and you'll never get it off.   Put one piece of pancetta in each muffin tin.  Add a few strips of red pepper. Crack and egg over the top. Put in the oven at 375 (sounds good, I think that's the temperature...maybe you should watch closely for this one). Cook until egg whites are firm.  

Think of all the variations and options!

Egggggggggssss.  Happy Easter!


Monday, March 30, 2015

Whole30: Chili!


Whole30: Chili, the best thing on earth.

So… I love making chili.  And I am going to share the 3 chili recipes that I have had success with thus far in my Whole30 career.  I didn’t make these up, and I really recommend that you follow @whole30recipes on Instagram...life changing.  It has given me a ton of new stuff to try out. 

I usually make one chili or soup for the week, and then two or three other entrees and rotate them for lunch and dinner.

Crock pot chili

  • 1lb beef chuck
  • 1 onion chopped
  • 2 carrots chopped
  • 2 minced garlic cloves
  • 1 diced bell pepper
  • 28oz can diced tomatoes (check ingredients)
  • ½ cup beef stock (check ingredients)
  • 1 tbsp paprika
  • 1 tbsp chili powder
  • 2 tsp cumin
  • 2 tsp coriander
  • 1 ½ tsp salt
  • ½ tsp pepper

Toss in the crock pot on low for 6-8 hours.
 

Next up, Southwest Cowboy Chili from Nom Nom Paleo:


This was SPICY after letting it sit for a day.

And, last but not least (and my FAVORITE!): Bacon Bison Chili


You don’t have to use bison, but it’s super delicious, so you should.

Sunday, March 22, 2015

Why Whole30?


Mostly, I am neurotic and always doing something.  It might be 100 consecutive days of working out, a cleanse, giving away something every day for 30 days, waking up at 4:30 am to go the gym 3 days a week, betting against myself using PACT app.  You know, crazy shit…all the time. I had heard of the Whole30 a few times.  A friend completed one and I was intrigued.  She said that she felt great and was sleeping better.
So, being me, I did research.  A lot of research.  I checked out their website, their book, blogs of people that had completed a Whole30, articles in semi-reputable magazines, yadda yadda yadda.  Then I saw an article that sealed the deal.  It was about a person with Psoriasis that completed Whole30 and got some relief. WHAT?! Relief from our uncurable condition? The plaques of itchy dry skin? The one that requires me to apply peanut oil saturated medication to my head for at least 4 hours multiple times a week? The one that also requires me to take methotrexate (low dose chemo) which makes me sleep for hours on end and feel like crap WITH NO RESULTS. The one that makes it so people think I have lice because my head itches so bad that I think I might cry if I don’t scratch it?  The one that has totally taken over my torso, looking like I have chicken pox? The disease that has annihilated my self confidence? The one that has completely removed dark colors from my wardrobe.  Requires me to do a quick “swipe  and shake” of my clothes when I enter a room.  SIGN ME UP.  Whole30, I’m with you. Oh, I might lose some weight?….bonus.

So, I studied the list of compliant foods, started following Whole30, Whole30recipes, and multiple whole30 adherents on Instagram.  I printed recipes, bought everything I needed, including some new spices and sauces, and embarked.
I already do meal prep on Sundays, so that was not an adjustment.  What was an adjustment was reading labels.  EVERY SINGLE LABEL, and discovering that sugar and soy are in almost everything. AHHHH!  Stay away from anything in a package or box is what I have learned.

So, here are my tips and tricks for a successful Whole30:
Food, Spices, Sauces

  • ·         Avocado, all the avocado
  • ·         Aidell’s Chicken and Apple Sausage
  • ·         Eggs (you should probably just get a chicken)
  • ·         Cashews
  • ·         Canned Coconut Milk (yes, I know Starbucks carries it, no, it has crap in it that is not coconut or water)
  • ·         Whole Chickens
  • ·         Coconut Aminos
  • ·         Coconut Oil
  • ·         Pork shoulder
  • ·         Bacon (go to Whole Foods and buy this. You have to splurge and you don’t want added sugar)
  • ·         Sweet Potatoes
  • ·         Lara Bars (check the ingredients, vanilla extract is a no no)

Kitchen supplies:

  • ·         Crock pot
  • ·         Veggetti or spiralizer
  • ·         Good knives
  • ·         Kitchen scissors
  • ·         Slotted spoon
  • ·         Tons of Rubbermaid containers (or whatever you use)

Ok, go. You’re ready.
Just kidding.  Check out Whole30.com for lists of compliant foods and the basics for the program.  But, basically: protein, healthy fat, veggies.  Cook with healthy fats,  add them to your meal (nuts in moderation, avocado….) don’t use things with added sugar or nitrates, no dairy or grains, no soy or corn or legumes (that means peanuts and beans…and other stuff). Don’t look for “paleo cookies” or other items that are technically compliant, but totally cheating because they are just a fake version of something that you are completely addicted to…like ice cream.  The point is to clear your system out for 30 days, then reintroduce things slowly so that you can pinpoint what your body is sensitive to.
I cook 3 or 4 main dishes on Sunday and portion them out.  I also portion out all of my snacks.  I then prepare some “just incase items” like a container of shredded pork, a ton of hard boiled eggs, pre-cut veggies, etc.  That way if I am feeling hangry, I just grab some stuff and cook it up.
After my first round of Whole30, I felt great. Then diet coke and I sort of started an affair that ended with me eating three boxes of Girl Scout cookies.  We broke up. You aren’t going to go hungry, but you will most likely have a wicked headache for the first few days.  Oh, and you’ll also feel waves of violence when people are eating sweet treats of delight in front of you.

So, is my Psoriasis gone? Nope. Is it better? Yes.  Autoimmune diseases are sometimes tied to inflammation, and cutting out certain foods helps with that, so I have experienced a little bit of improvement.  The other shitty thing about autoimmune diseases is that people usually have more than one, and I do.  BUT, I read an article yesterday about a person experiencing my secondary autoimmune disease and has adopted a Whole9 approach to life (check out the website or book), and her diagnosis was REVERSED. WHAT?!  So, fingers crossed, but I honestly don’t care that much….I feel better when I am eating healthy, and I am a person that needs guidelines, so this is perfect. Holler at your girl if you want some recipes.

Monday, October 20, 2014

Pumpkin Dip

Hey! You should make this! 

It's delicious. I served it with a mixture of Gala, Fuji, and Granny Smith apples, as well as thin ginger snaps. And only 107 calories for 2tbsps!
Then, go to Safeway and buy a pumpkin dish from the seasonal aisle to make it festive.

Sunday, October 19, 2014

Biscuits and Gravy Casserole

I grew up in Ballard before it was a hipster heaven. What was it like then? Blue collar and working class glory. I spent afternoons and summers running around in "the gully" (if you're cool enough, you know). Dinner was always some sort of casserole because it was cheap, easy, and filling.
My love of the casserole has stayed with me, as you can see by my multiple renditions of tater tot casserole. 
Another thing I loved as a kid was when my mom would be at a PTA meeting or sometimes a knitting class and it was "Dad dinner night." This meant McDonald's or breakfast for dinner. Tom Galloway is an expert in bacon, sausage, and soft boiled eggs. Therefore, I love savory breakfast. So, combining those two lives, I give you my masterpiece: Biscuits and Gravy Casserole
You will need:
9x13 pan, sprayed with non stick spray
Oven heated to 350
1 package of shredded cheddar cheese (16oz)
6 eggs
1/2 cup whole milk
I log of Jimmy Dean Sausage in maple
2 packages of sausage gravy mix
1 can (16oz) of Pillisbury buttermilk biscuits
Salt and pepper 

Start out with your biscuits. Lay them all out and cut them into 4ths, like, in half, then in half again. Spread those in one layer along the bottom of your pan. 

Next, cook the sausage. You want it to be loose, not in patties like the package tells you. Cook it like hamburger helper. Drain off the fat and salt and pepper it, then spread on top of the biscuits. 

Now, beat the 6 eggs and the milk. Spread the cheddar cheese over the sausage and then pour the eggs over the top.

Make the gravy per the package directions. When you pour it over the eggs, they will start to cook because the gravy is HOT. Don't freak out. Just put it in the oven! 
Bake for about 35 minutes.

Take it to Seahawks Sunday and revel in the praise. 
Direct quote "I could eat that entire thing."

A little trashy is always the best.
Make sure to serve it on Ballard chinaware:
Serves 8 at 414 calories each.

Sunday, May 25, 2014

Baked French Toast deliciousness


So, Mother's Day has not always been my best holiday.  I tend to work best under a deadline, and this one always sneaks up on me, and then I go "well, better luck next year."  Plus, my mom already has something planned because she has a Mum to plan for too.  This year was a little different. Mum has been in and out of the hospital and generally loving to not get out of bed.  So, we would be going to visit her at Bayview, and not planning some brunch out or BBQ, or whatever we typically do.
So, I decided we would have brunch at my house. Thomas was on board and  wanted to make BLTs, I said I'd cover the rest.  I gave Mom some options, she picked baked French toast, and it was AMAZING.  I got the recipe from Martha Stewart.  just called her up and said "hey, I need a recipe.' Here is the link for those of you that don't have her phone number: http://www.marthastewart.com/346883/baked-french-toast

And, as usual, I messed some stuff up which made it better! Like, in the step where it says to add 1/3 cup sugar, I just put in all the sugar I had measured out (1/3c + 3T), and Safeway didn't have a loaf of brioche, so I used brioche rolls cut in half.  I always used a metal pan, and I let the brioche soak in the batter overnight.
But, my dad ate almost half of it, so I call that #WINNING (I've been waiting for an appropriate time to bring that back).

Sunday, November 24, 2013

Chicken and Rice Soup

In another battle of "all if your food is going to go bad," I won, not the garbage can!
You will need: 
Leftover chicken
32 ounces of chicken stock 
One carrot
An onion
Thyme
Brown rice
A can of kidney beans

Chop up the carrot and onion. Throw everything in a stock pot except the rice. Bring to a boil. Add in the rice and simmer (does anyone know what that REALLY means?). I just turn the heat down and walk away. If I hear a distant bubbling, I return and turn it down more. When the rice is tender, your soup is done!

Sunday, October 27, 2013

Mini Ham Sandwiches

Because nothing makes you more creative than a short timeline, I decided to make my "football food" for Coburn's birthday at 3. Party starts at 4:30, and...I was picking up a friend at the airport at 4. Way to go with your excellent time management skills! Good thing I'm teaching life skills to the future generations: we're screwed. Sorry!
Anyway. I decided to make these little delicious ham sandwiches that I saw on Pinterest. But, because God likes to intervene in mysterious ways that I don't understand, my phone would not load the recipe that I had pinned. So, I made it up, loosely based on what I remembered from my 3am pinning frenzie the night before (I watched a show about Hollywood murders, then tried to go to bed... Another brilliant idea by Erin).
You will need:
9x13 pan
Package of Hawaiian sweet rolls
Chive and onion cream cheese
3 Aged Swiss sandwich slices 
1 package Thinly sliced Black Forest ham
1/2 tbsp Onion flakes
1 tbsp Worcestershire 
3/4 cup melted butter
1/4 Parmesan cheese

You don't have time for music. You are in Marshawn Lynch Beast mode. Turn the stove on and put the butter in a pan to let it melt. Don't let it burn!  Open the Hawaiian sweet rolls and cut them in half. Now, place all of the bottoms in the pan. 

Layer two pieces of ham on each roll. Tear the Swiss cheese slices into four pieces each and place those on too. Next, spread the chive cream cheese on the top buns and place them on top. 
Your butter should be well past melted by now and hopefully you have already removed it from the heat. Add all of the other ingredients, except for the Parmesan, into the butter and mix. Pour the mixture over the top of the rolls. Sprinkle the Parmesan over the top. 
Put some foil over it, grab your coat, and drive to the airport ( or if you are normal, leave it sitting for at least 20 mins).
Send a text to Yoda telling her you need the oven two minutes before you show up.
Put the little sandwiches in a 350 degree oven for 15-20 minutes. 

Delight in how your little sandwiches bring Packer and Viking fans together for more than two seconds. And then win the real reward: hanging out with Jasper.

Sunday, October 20, 2013

Acorn Squash Slices

Shannon, this is for you. I hope you can have brown sugar. Maybe you need to send me a list of foods you can have. 
Anyway, I bought an acorn squash for God knows what reason. It just felt right.
Then I did my usual "let this thing sit in the fridge forever" trick. It really inspires me to get creative. 
I cut the squash in half, gutted it, then sliced it.

Next, I realized that my cookie sheet was at school, so I put all of the slices in a ziplock bag. Guess how many days it took me to remember to bring the pan home..... 3. Luckily, there was no mold growing, and so far I'm not sick. I think we're in the clear. 
So, I tossed in some olive oil and brown sugar and shook it around in the bag. 
My oven was already at 400 degrees from making corn bread muffins (substitute coconut dream for milk and you'll never use cows' milk again). Lay the squash flat on the cookie sheet and cook for 5 minutes. Take a fork and turn over the pieces. Cook for about 15 more minutes.
I actually totally forgot about them and I think they were in there for more like 20-25, so they are a little more soft, and the pan was harder to clean because brown sugar and olive oil make black tar that requires a copper scrubber to remove. 
So, don't do that. Set a timer.
But, delicious either way!

Pressure Cooker Experiment aka everything is broken and I can't tell the difference between pork and beef

So, I went to visit my 97 year old Grandma the other week.  I affectionately refer to her as Mum. Mum, in her old age, does not give a shit.  She tells it like it is.  I walked in to her apartment at Bayview Manor to "Your purse is huge.  Go get one out of my closet.  Why do you need a purse that big? I never used a purse that size.  I'm sure that there is one in the glory hole that you can have." The "glory hole" is what she calls her walk in closet that I have to go through about every two years and eliminate all of the empty cookie tins and other weird stuff that she saves, like boxes with no lids.

Anyway, I left with a purse, a tin of cookies, and a pressure cooker.  After asking other people what to do with it, and Googling directions, today I dove in to pressure cooking.  It's weird.


So, first of all, I got confused.  I had a cut of beef that the guy at the store said would be good for pot roast and I also had some pork shoulder.  The pork shoulder ended up in the pressure cooker.  My bad.

What you need:
A pressure cooker (this one is electric)
3lbs of beef roast (chuck roast apparently is good)
salt, pepper, and garlic powder mixed together (enough to rub on the roast)
beef broth (a can)
3-4 carrots, peeled and cut into bite sized pieces
2 sweet potatoes cut into bite sized pieces
2 onions (small sized, or 1 big one) cut into quarters
1.5 tbsp. Worcestershire sauce


So, first, put on an apron.  I would also advise investing in some good tongs.  Mine suck, and I ended up grabbing a hot slab of meat with my hands.
Turn the pressure cooker dial to about 300 and heat up some vegetable oil in it (about 2tbsp.)
Brown the roast on all sides.  This was when I started to swear and grab random utensils in an attempt to flip the 3lb slab of raw meat, almost dropped it, and then grabbed it with my hands. Nothing like blood all over your hands and counter.
Don't give up though, you have a pile of raw meat waiting for you.  Once the meat is browned, rub the salt, pepper, garlic powder mixture on it.  Then, pour in the beef broth and the Worcestershire sauce and add in the onions.
Now, you get to figure out how to close the lid of the cooker.  Right tighty would be your first guess.  WRONG.  It goes left, of course! HAHAHAHA.
Now you are going to "bring it up to pressure".  I'm not sure what that means.  I turned up the heat to high, and put on the little screw top thing, which was broken.  So, steam was escaping the entire time. Thanks Mum!  I was not discouraged by this discovery and just continued on.
After 30 minutes, I "released the pressure the quick way."  I think that if I had a fully functioning pressure cooker, I would have removed the little cap.  Since mine was broken, I just opened it up.  I tossed in the carrots and sweet potatoes, closed it back up.
I then let it cook for another 15 minutes.
When I "released the pressure the quick way" again, I realized that I had put the pork shoulder in because the meat was very white.  I've talked about my relationship with pork before...I'm scared of it being raw. So, I got out my trusty meat thermometer to make sure it was done. Nothing.  Broken. yep.
So, I took the pork and veggies out of the pressure cooker, and cut that bad boy up.  It was looking a little pink, so I tossed it in the oven for 10 minutes at 350.  Done and done. It's delicious.

Saturday, October 12, 2013

How to not look like a whore in red lipstick

I think I'm pretty good at wearing red lipstick. I'll work on being humble tomorrow.
Here are some examples: 

Red lipstick is easy if you have the right tools and apply it correctly. Also, you need to find a red that is good for you. I like matte reds and my two favorites are Ruby Woo and Russian Red by MAC. 
To do red right you need:
Lip liner (I use MAC Cherry)
Lip primer
Lipstick brush (thin angled brush) 
Lipstick
Here is a photo collage of the steps followed by instructions: 

So, first exfoliate your lip by gently brushing it with your toothbrush. Next apply your lip primer. 
If you look closely, you can see the scar on my face from being savagely attacked by a cat at the age of 12.  It scabbed over and I looked like a freak for about a month with my "half stache." Middle school is a cruel, cruel place. I'm sure my floral MC Hammer pants didn't help.
Anywho. Next, apply the lip liner. Make sure it is sharpened. If not you won't get a crisp outline. 
Now, take your brush and fill in your lip with the lipstick. I only use the tube directly on my lip when reapplying because it's much quicker. Applying with a brush lasts longer. I usually only need to reapply because I was eating a burrito. 
Go figure. 
Now, go out and wear red lipstick! You will immediately feel 10x hotter.

Cilantro Lime Brown Rice

I did it! After three different versions I think I figured it out.  I have recreated the Chipotle Cilantro Lime Rice!
So you will need:
1 tbsp. oil
2 cloves of garlic (minced)
some salt
1 cup brown rice
2 cups of chicken broth (or if you are a veg head, vegetable broth)
juice of about 1 lime
1/3 cilantro (chopped)

So, take the garlic, rice, some salt and pepper and toss it in a pan with the oil.  Mix that stuff around for about 2-3 minutes, until the rice is starting to look a little translucent.  Next, add the broth and lime juice and pinch of salt.  Bring all of this to a boil.  Cover before you turn it down to low.  Set a timer for 40 minutes.
I use this time to check what's going on in the world, or Facebook stalk.  Maybe you could paint your nails, or take a shower.
Come back in 40 minutes and remove the rice from the stove.  Fluff that stuff up with a fork, mix in the cilantro and dig in.
It's not as good reheated, so invite over some friends to eat with you, or just consume an ungodly amount of rice.  Or cut the recipe in half.

Here is how the recipe looks on my fridge:
photo.JPG
Again, you're welcome.

Friday, October 4, 2013

Printing on Fabric

I've been stenciling for quite a few years. Mostly because I'm too lazy to learn how to screen print, and partially because you really have to use your brain to do it. And we all know there is nothing more satisfying than using your brain, then getting to tell everyone how smart you are.
I will pass on my tips, techniques, and info here. Do with it what you will.
I use overhead projector sheets to make my stencils and I use an exacto knife. You'll also need screen printing paint and a roller or paint brush.
Start by thinking about your design. 
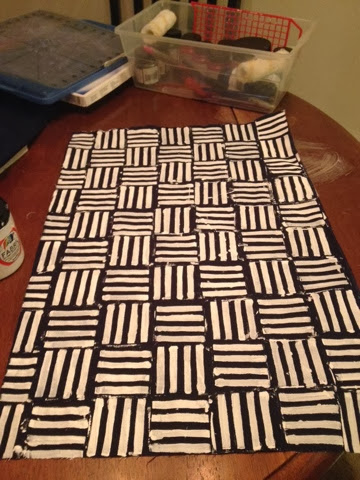
This is what I decided on. Next, get a sharpie and your overhead projector sheet. Draw the design on to it. Remember that what you cut out becomes ink and what you leave will be the fabric you are printing on to. This is the tricky part for those of us with poor executive functioning. Take your time. I like to go super slow and do random things in between like go to Target and buy a new vacuum, or reapply my makeup (favorite time wasting activity). 
Look at that!
Now, you get to start the fun part...
Decide if you are going to use a roller or a paint brush. If you roll, you get more crisp lines and even paint, and you get to say cool things like "oh I'm just rolling out this stencil, then I'll be right over." If you use a brush you can get more precise shapes and you don't have to worry about extra paint at the edges of your stencil. Your choice, I could care less what you do. 
Now, position your stencil and use your method of choice (I did both for this project).
Don't use the paint directly out of the container, use a leftover babyshower plate. Sometimes you might want to add a little water to the paint. Don't add too much or it will bleed out and ruin the crisp details of your stencil.
When you are done let it dry completely (or use a hair dryer to speed up the process because obviously, waiting is for losers). 
When it is dry, use a piece of shit towel and lay it on top of the fabric with the paint side up. Turn your iron (that you "inherited" from your first college roommate) to the highest setting. Iron the entire surface, holding the iron in place for a ten count before moving to the next space. I kinda do this half assed and have never had an issue, but I'm trying this new thing called following directions.

Now, you've got some cool fabric!